
I’ve recently been upgrading the tokens and counters I use when running combats for my GURPS games. It’s an ongoing process — I tinker with this and that, use it for a while, then move on to something else. But I like where things are right now, so I thought I’d give an overview of some of what I’ve experimented with.
I started with unpainted lead figures on a Chessex battlemat back in the mists of time, but always found that a bit bland (and have zero talent for painting minis to spice them up). There is also an enormous plastic tub of pre-painted plastic D&D figures lurking in my closet, which is fantastic…if I’m running a Fantasy game, and the party is fighting the types of creatures I have on hand. But I run a myriad of genres and settings with a generic rules system, so that doesn’t always cut it.
No, my goal is to have a way of representing the PCs and their NPC enemies on a hex map so I can quickly tell at a glance where everyone is. If I can also see something about their current condition, so much the better.
A few years back, I was using tri-fold cardstock figures I printed myself:
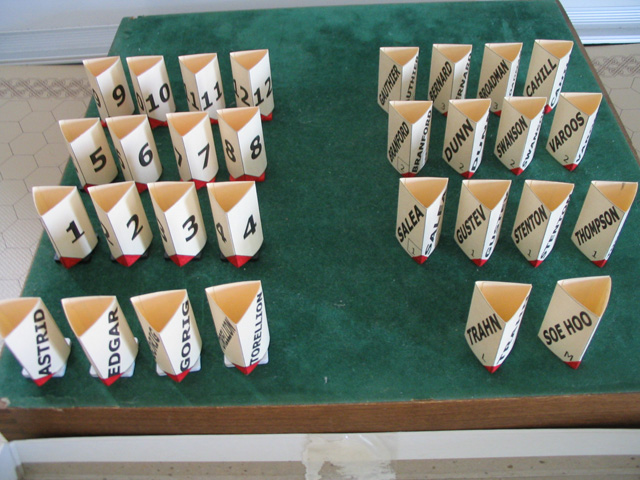
I really liked how clear and easy these were to read, but they were a bit too utilitarian and had no flair. Also, even using cardstock, they didn’t have enough weight to keep from being blown over or moved around inadvertently (though plastic stands eventually helped with that).
For my Jem: License to Kill game a couple years ago, I tried something new:
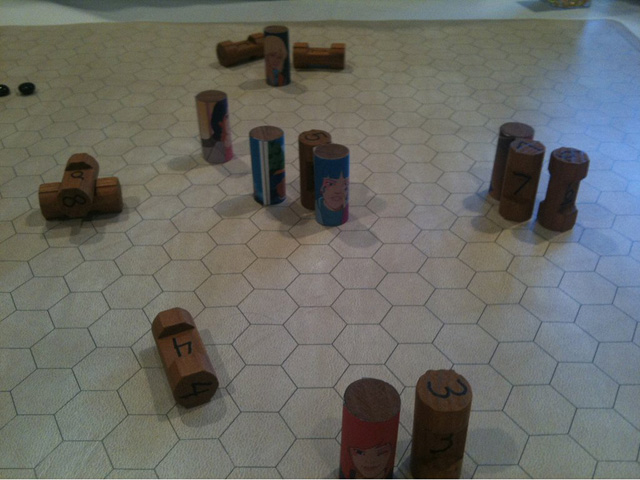
Using Lincoln Logs, the PCs got color faces and the NPCs got generic figures, hand-numbered 1 to 10. Laying down the log was an easy way to show a character either unconscious or dead.
This worked pretty well for a good long while, but the handwritten numbers always bothered me a little bit, and taping/rolling the pictures onto the logs was a pain.
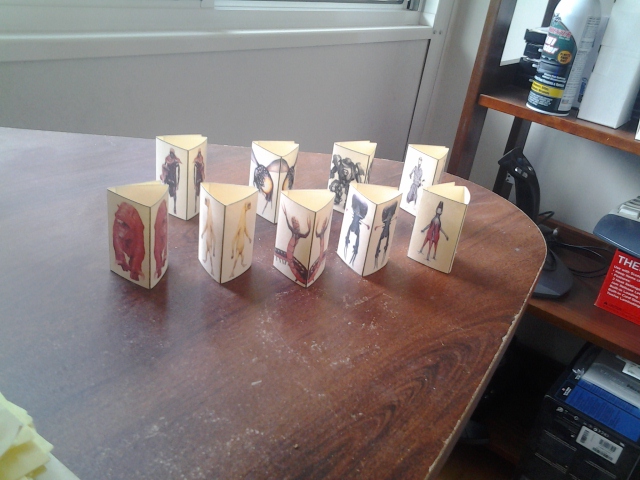
So for my last two convention games, I went back to cardstock figures with plastic bases (not pictured), for my Cynosure game…
…and for my Dungeons & Dragons: Requiem game:
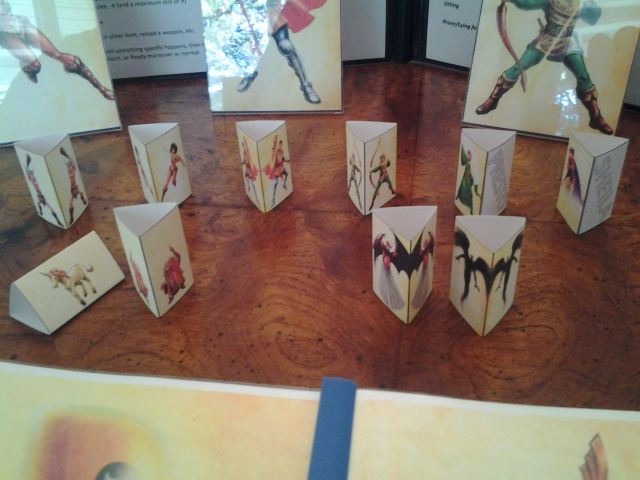
These looked great, and for games where I know what the PCs look like beforehand, I’ll keep on using them. But I also wanted to upgrade my NPC figures from the hand-numbered Lincoln Logs. I settled on these lovelies from Alea Tools:
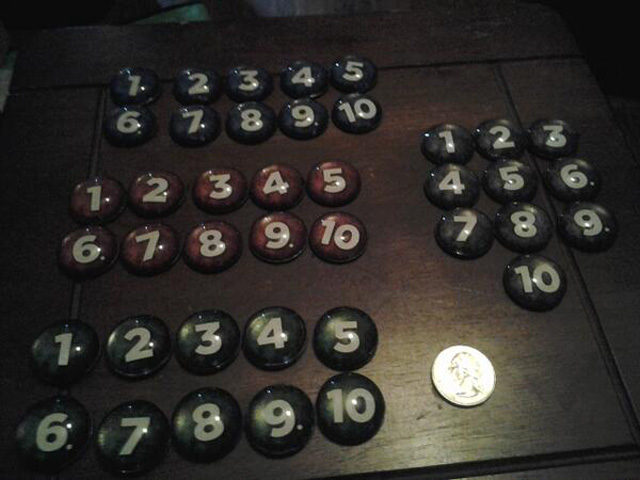
They’re heavy (made of glass), super easy to read, come in multiple colors (for tracking different types of NPCs simultaneously), and have ferrous bottoms (that is, they themselves are not magnetic, but magnets will stick to them). I love them!
But I still had one hole in my system. I ran a Halloween one-shot for a bunch of different groups over the last few weekends, and since the players had the option of whipping up their own character before the game, I had no idea what the final PCs would look like. I couldn’t pre-print tri-folds for them. What I ended up using were the player pieces from the Tsuro board game, eight identical tokens of different colors. This was “good enough” to get us through, but the tokens fell over now and then, and also have dragons etched into them (which didn’t really fit the Halloween theme).
Enter, the fine folks at MeepleSource (the Tsuro game pieces are also pictured):
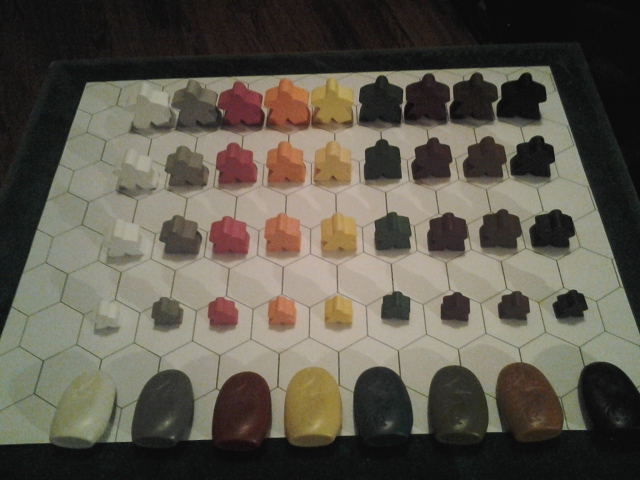
I ordered nine different colors of three different-sized meeples — standard, mega, and super-mega. When the package arrived, I noticed that they also threw in a free set of mini-meeples in the same colors, which to me is fantastic customer service (spending less than a buck earned them a lifelong meeple customer…though I admit my ongoing need for meeples is probably kind of low).
At this point I felt pretty good about my options for any needed PC or NPC figures, so I began thinking about incorporating some of the magnetic status markers from Alea Tools as well.
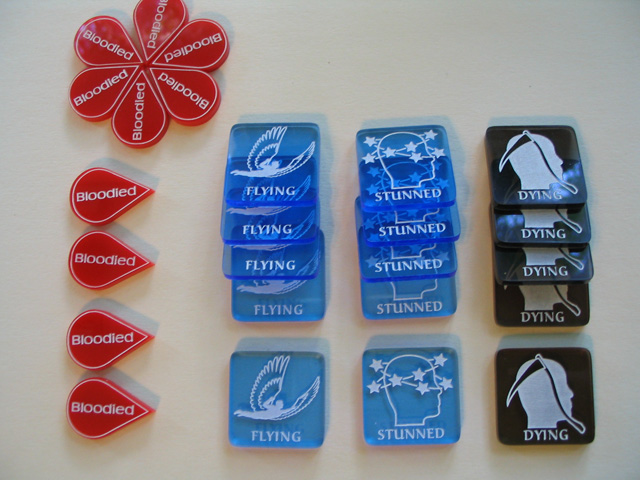
I’ve toyed with a few kinds of status tokens in the past. Dapper Devil makes a host of really great ones — here are just a few I’ve used:
Ultimately, though, I never used them much, mostly because they need to be laid next to the figures and not under them, defeating my goal of reducing clutter. They also didn’t help with the number one thing I tend to forget when running combats – the character’s shock penalty. In GURPS, this is a temporary penalty (usually -1 to -4) suffered on the turn after taking damage. It’s a rule I like, I want to use it in my games, I just often forget or lose track of it from turn to turn, especially with multiple combatants. For a time I used small red poker chips with the penalty written on them in black Sharpie, but as with the above tokens they just cluttered the map up even more.
My solution was some of those magnetic status markers from Alea Tools. I ultimately decided on a 10-pack of black, a 10-pack of yellow, and two 10-packs of red to start. I am using the red markers to indicate a wounded character, and the black and yellow “bumblebee” markers to display their current shock penalty — a single black marker for -1, a black and a yellow for -2, two blacks sandwiching a yellow for -3, and two blacks and two yellows for -4:
So, in this quick example, we have four PCs (Yellow, Orange, Pink, and Green meeples) engaged in a battle against three Orcs (green tokens 1-3) and five Kobolds (red tokens 1-5).
Position and facing for all characters are clear (just using an imaginary line through their vertical axis). One of the Kobolds is already dead (red token 4, turned over showing black base); the other four are undamaged, as is Orc number 3. Orc number 2 is wounded, but has no current shock penalty; Orc number 1 is also wounded, with a shock penalty of -2. Finally, all of the PCs are wounded except for Pink; Orange has no shock penalty, Green has a -1, and Yellow has a -4.
I really like how this is working out so far, at least in solo combats against myself. The markers stack up quickly and easily. The only thing I might add, if I could do it elegantly, would be a way of displaying how much a character is wounded instead of just a binary “yes/no,” but that’s a minor quibble. Overall, I am totally digging this!
I know, for the GMs out there who already eschew battlemats and minis, a setup like this leads to the mouth of madness. But for those of us who like the crunch of tactical maps and combat, it’s the best I’ve come up with so far. I’d love to hear any ideas for figures and tokens that have worked well for other groups — and I hope you might have found a useful idea or two here, too.
Great range of tokens and token ideas. Thanks.
Hi, i did this: a thin layer of polymeric clay, sliced in 1 inch squares for the bases. I stuck a vertical paper clip to each one while fresh, and I numbered them. In game I add a printed paper mini to the clip. I have one of these bags for paychecks with 500 miniatures ordered alphabetically.
Sorry for my shitty english, if you want some pics for better understanding write me.
I did make-my-own pogs by printing 1-inch round images, cutting them out with a 1-inch hole punch (from the craft store Michaels) and gluing them to 1-inch wooden circles (also from Michaels)
For stand-up tokens (usually solos) I would print two images on paper, fold them over (like your tri-fold with one less side) and snap a mini binder clip on the bottom. Squeeze the binder clip handles off and you’ve got a homemade mini!
While I was printing out the images for the tokens I would also print out a tent with the image on the player’s side and stats on my side. The players would have their own tents (again, picture on their side and stats on mine) and I would arrange them in initiative order on the top of my DM screen.
Awesome ideas 🙂
Those mini binder clips are awesome — I use them the same way for my tri-fold figures (’cause then I don’t have to glue them, and can transport flat!)
I’ve not actually done this yet, but like Jeff Shepherd I’m going to print two images on paper, then I’m going to laminate them and cut it out. I’ll use them on a custom printed battle mat which I will laminate. (using the European A3 size paper.) The scale I will use is unusual, being 32mm to 5ft, which is based on 4 Lego blocks. I’m also going to use some Lego minifigures and actual Lego to create some scenery.
Also, I’m considering the different scales that can be used for buildings and spaceships for example.
There’s a list of Lego figure sites in another post (https://www.themook.net/gamegeekery/using-lego-minifigs-for-rpgs/) — a lot of that stuff is really, really cool!
I’d love to see pics of any of that you end up using for your game.
Okay, I love the idea of numbered tokens in different colors and was going to toss some money in Alea’s direction. I wanted at least three different colors and suddenly the cheapskate in me said I’ve already got the tools to make my own.
In a spreadsheet I ran the numbers 1 through 9 in the columns and set the row background to various colors. A quick print then the circle punch and glue and the wood disks and suddenly I’ve got dozens of generic minion pogs. Not as nice as Alea’s but I’m ready for this weekend.
I still print the image on an initiative tent so they can better visualize what they’re fighting. Now I realize I should also print some tent color swatches so I can flag the monster with what color pog it is.
Excellent DIY work there, Jeff. 🙂 You could even magnetize them easily enough!
A follow up post to this one just went up: https://www.themook.net/gamegeekery/more-tokens-in-combat/